This article explains how to get started using CodeGuard to backup and restore your website / database data.
Adding a website to your CodeGuard account
-
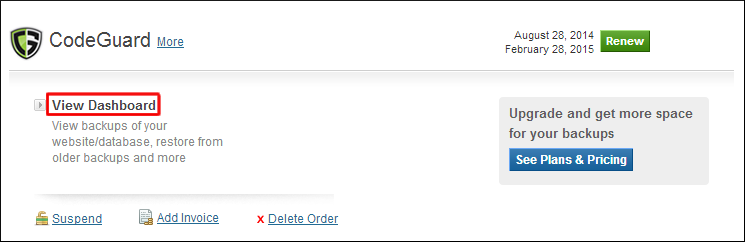
Login to your Control Panel, search for the domain name for which you have purchased this CodeGuard Order and go to the Order Information view. 1
-
Click the View Dashboard link to visit the CodeGuard dashboard.
-
You will be required to add your website FTP details, if you are logging in to the CodeGuard dashboard for the first time. If you have the FTP details, proceed to step 4 directly.
If the FTP details are not available, you can fetch them for an existing FTP user. This process is explained below for a couple of commonly used hosting control panels:
-
cPanel:
-
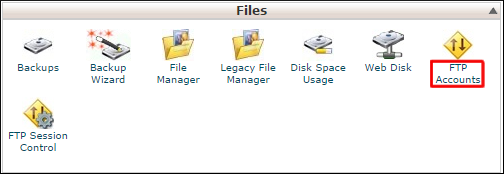
In the cPanel control panel, click the FTP Accounts link under the Files section.
-
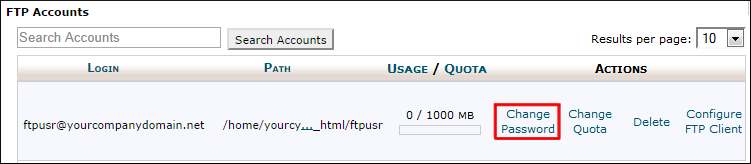
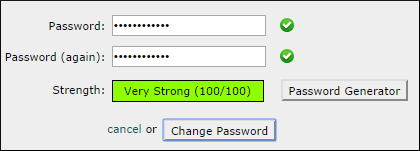
Under the FTP Accounts section, click the Change Password link for an existing FTP user.
In case of WHMCS Domains's Linux servers, you must use the default FTP user that comes with your cPanel account. You cannot connect to CodeGuard using any other FTP user.
-
Modify the password for the FTP user.
-
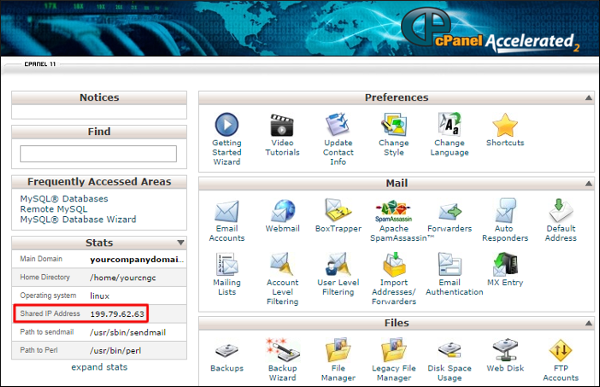
In the cPanel control panel, look out for the IP address under the Stats section.
-
-
Plesk:
-
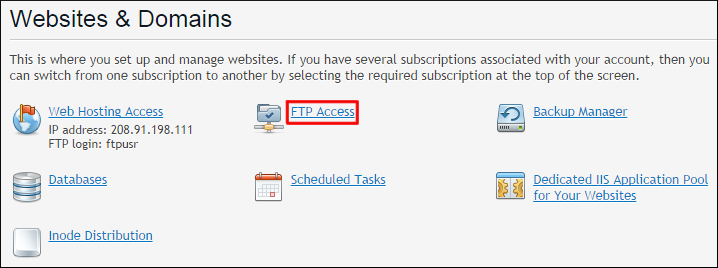
In the Plesk control panel, click the FTP Access link.
-
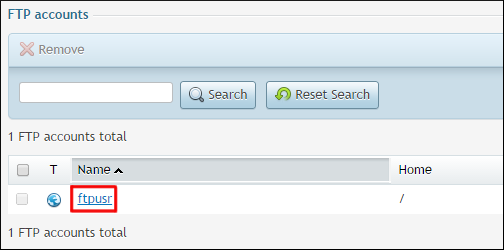
Under the FTP accounts section, click the FTP user link for an existing FTP user.
-
Modify the password for the FTP user.
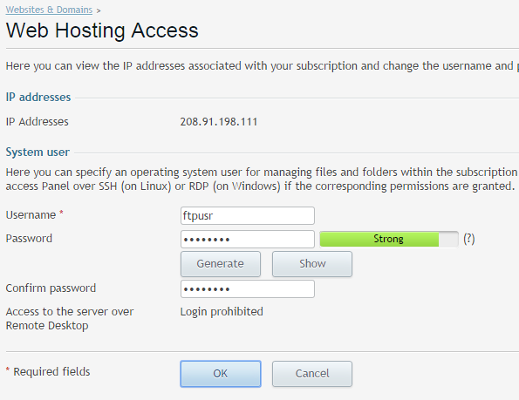
Here, note down the IP address of the server listed in the IP Addresses field.
-
NOTEThe process of FTP user management varies for different hosting providers. You need to consult their support team or documentation for more specific instructions.
-
-
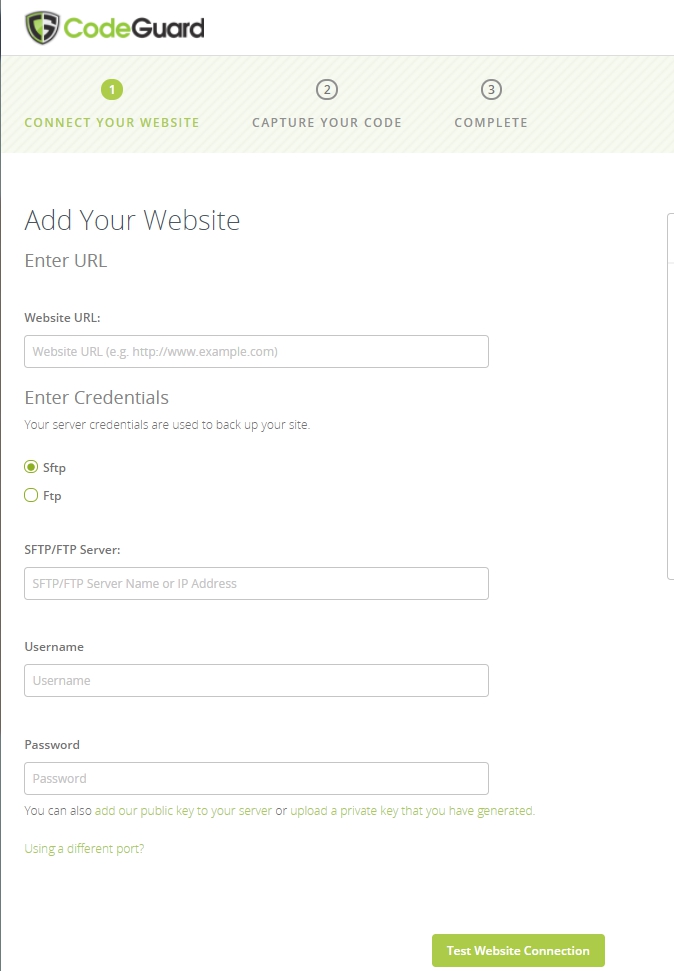
Provide your website FTP details.
If your website is hosted on WHMCS Domains's Linux servers use the SFTP option and for WHMCS Domains's Windows servers, use the FTP option.
 NOTE
NOTEIn case of other hosting providers, you can choose either the FTP or SFTP option, based on your service provider's settings.
If the FTP port for your website is different, you can specify it using the USING A DIFFERENT PORT? link.
Click the Test Website Connection button to check server connectivity.
-
On a successful connection, you will see the screen shown below. Select the root directory of your website and click on the Select Root Directory button to proceed.

-
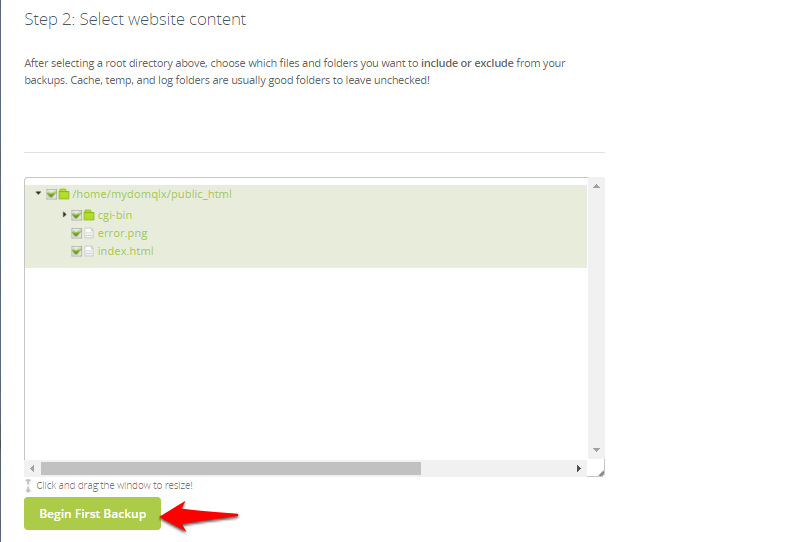
Select the files you want to backup and click on the Begin First Backup button.
-
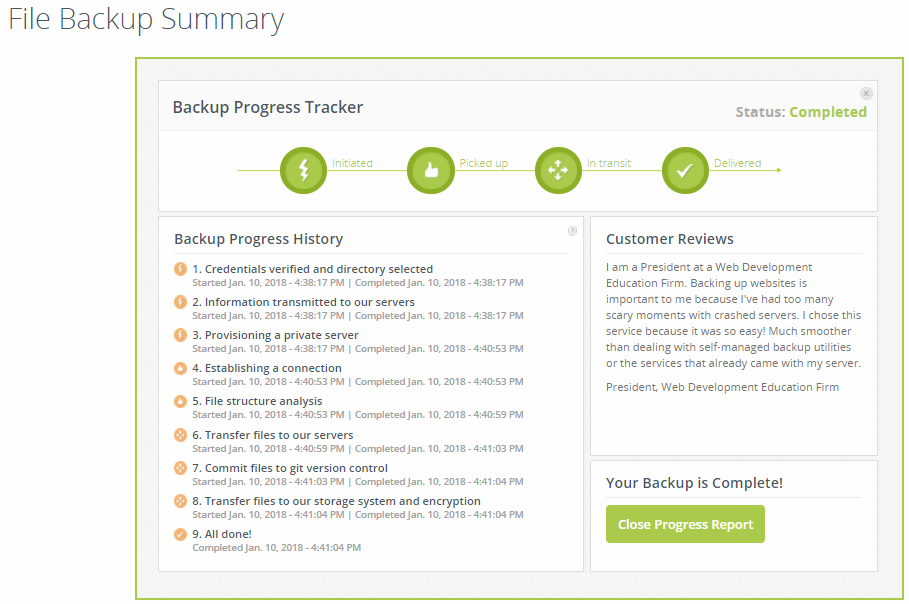
Once the backup process starts, you can view its progress. You will see the screen displayed below, once the backup process is completed.